She has endured many years without grumbling and moaning – and that in good and bad times. Of course we are talking about the toilet! But the ravages of time do not stop even at the quiet place. So it is appropriate at some point to renew this – admittedly very private – place. Because on a new WC it does not only sit better.
Modern toilets also offer many a luxury that, once tried out, nobody would want to miss anymore. But first there’s something completely different on the agenda: dismantling the old toilet! In the following article we will show you how this can be done and what you have to pay attention to when dismantling the toilet. You can read more here about plumbing services for great details
THE PROJECT: DISMANTLING THE TOILET
The old toilet is not broken, but from time to time a change of scenery even on the toilet is happy. The aim of this project is to dismantle the old toilet to make room for a new one. The old toilet is a standing toilet with floor drain and integrated cistern. So the WC will be dismantled together with the cistern.
If the cistern also has to be dismantled, special precautions must of course be taken to prevent flooding, which in the worst case would necessitate further renovation measures. The closing of the angle valve is therefore of particular importance. And don’t worry if the cistern is not integrated as here, but instead mounted directly on the wall. The procedure for other stand-alone WCs is very similar to the one shown here.
TURN OFF THE WATER LINE AND EMPTY THE WC.
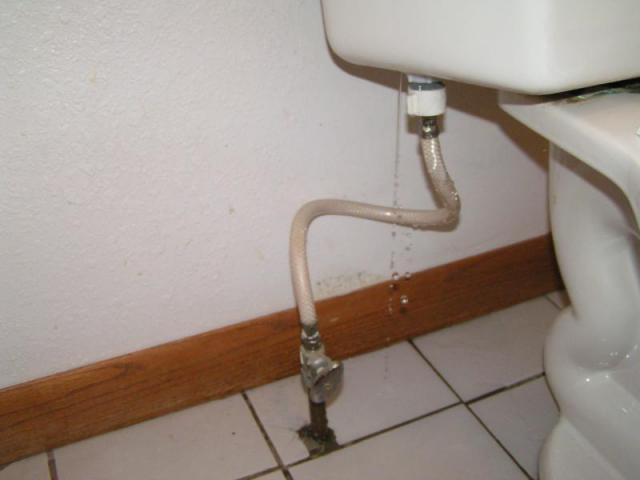
The first step in dismantling the toilet, including the cistern, is to turn off the water. This is done according to the local conditions either by closing the corner valve near the cistern or by turning off the main water tap. The first is, of course, the simpler solution if there is a corner valve and it can also be moved.
Unfortunately, it is often the case that the angle valves are not moved (opened and closed) for years and thus rust. Closing the angle valve is then almost impossible. The only help here is to turn off the main water tap and replace the angle valve during dismantling.
Note: In order to ensure the function of the angle valves in the long term, it is worth closing and opening them once a year. When unscrewing, make sure that the valve is fully opened and then turned back half a turn.
Once the water has been switched off, the cistern can also be emptied. In a dual-flush technique, it is best to use both pushers to empty the cistern completely.
DISASSEMBLING THE PIPE FROM THE CORNER VALVE TO THE CISTERN
If no water runs into the cistern after emptying, the water has been turned off successfully and toilet dismantling can proceed to the next phase. The next step is to disassemble the pipe from the corner valve to the cistern. The union nuts on both the corner valve and the cistern are loosened with a size 19 open-end wrench. Once the nuts have been removed on both sides, the pipe can be removed. But please do not use brute force! If one side is stuck, it is usually worth pulling the pipe out of the connection on the other side. Depending on how deep the pipe is in the connection, one side will be easier to loosen.
In addition, the second existing water pipe, which leads from the T-piece of the cistern to the toilet seat, is also removed from this toilet. This had the task of supplying the toilet seat with water for the shower function that was already installed at the time.
OPEN CISTERN AND DISASSEMBLE IF NECESSARY
To further disassemble the toilet, open the cistern in the next step. This Geberit cistern can be opened by turning the cover of the actuating knob. Once it has been unscrewed, the lid can be easily removed and the view inside the cistern is unobstructed. The inside of the cistern can now be seen, essentially the filling valve including float and the actuating device. The two screws at the bottom of the cistern, which connect the cistern to the WC, are also visible.
If the cistern is to be disposed of separately or if there are not enough strong supports available, it is worth dismantling the cistern. If possible, loosen the screws on the underside of the WC. But beware, the remaining water from the cistern will run out! It is also possible that these screws cannot be opened so easily, as they will be very rusty due to years of underwater use.

DISMANTLING THE TOILET
After that the toilet can finally be dismantled. First remove the two screws in the base area of the toilet. A Phillips screwdriver helps. Once the two screws have been removed, the WC is carefully pushed forward, either with or without cistern. Care is taken to ensure that the WC slides out of the drain pipe without any problems. Then it is already done and the toilet is dismantled!
Note: If the WC and cistern are separated, the WC will also have to slip out of the bow. However, this is usually unproblematic. Then the cistern has to be screwed off the wall if necessary.
Once the toilet is free, it can be removed and disposed of by strong carriers. But be careful when carrying it! Because a certain amount of residual water will leak depending on the position of the toilet. After all, the siphon (bow) of the toilet is still filled with water.


