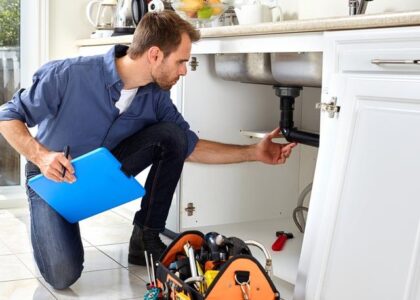
Before doing this upkeep you need to discover if the reason the faucet is dripping is that it was frozen and also components the within may be damaged. frost totally free hose pipe bibs may ice up during freezing temperatures if a tube is left affixed to it or if the pipe bib is mounted with the slope of the hose pipe bib sloping in towards your home. Both problems stop the hose pipe bib from draining pipes when it is shut off and then when freezing temperatures happen the hose pipe bib freezes up and also is damaged. This article teaches you just how to identify issues with leaking frost complimentary tube bibs and fix them.
Devices and also Products:
- Screwdriver, usually a Phillips head
- Adjustable pliers
- Adjustable wrench’s (2 )
Discover Where The Leakage Is Originating from There are four areas that a frost cost-free tap or exterior hose bib can leakage from:
- Through the vacuum breaker (when it’s activated).
- Around the handle (when it’s switched on).
- Out of the tap spout (when it’s shut off).
- Cold and splitting television.
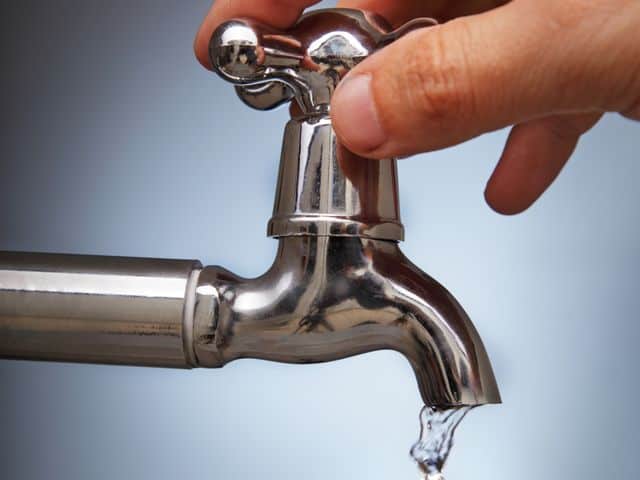
Dripping outdoor faucets that are frost complimentary can be tricking due to the fact that they will certainly drain water for a number of seconds after they are switched off. The factor they continue draining pipes is since the shutoff that closes the water off is numerous inches behind the faucet, typically regarding 12 to 18 inches. This is so there will be no water near the outside of the house where it is more likely to freeze. It is regular for a frost cost-free hose bib to drain water after it is shut off. If the water does not quit after a couple of seconds or water is originating from some other part of the tap than the spout then you most likely have a leaky faucet. Keep reading to learn just how to take care of one of the most usual leaks for an outside faucet.
Leaking Through The Vacuum Breaker: Frost’s totally free hose pipe bibs have a vacuum breaker that rests simply above the tap handle. The vacuum cleaner breaker allows air ahead right into the tap when it is shut off to make sure that the water can drain out of the stem that returns right into the wall of the house. Water needs to not appear in the vacuum cleaner breaker when the faucet is switched on, it is a one-way valve that ought to only let air in. If water appears in the vacuum breaker after that the interior components are more than likely not functioning correctly.
Repair The Vacuum Cleaner Breaker: Eliminate the cap covering the vacuum cleaner breaker by using even as well as upwards stress on both sides of the cap. Under the cap, you will certainly see the vacuum breaker parts. Try to cleanse them. If cleaning the vacuum breaker components does not stop the leak after that you will need to purchase replacement parts at a local plumbing store.
Dripping Around The Handle: Make sure you turn the water off prior to eliminating the packing nut or other valve components. There are a number of nuts as well as washers inside the dripping faucet. The packing nut is straight behind the faucet manager, it holds the components inside the tap stem. There is a washer directly behind the packaging nut.
Repair The Leak Around The Faucet Deal with: First, try to tighten the packaging nut. Utilize the adjustable wrench to tighten the nut up until it is tight. Don’t over tighten up the packing nut just make it tight. If you tighten the packing nut as well as still have leakage around the tap manage after that you will require to change the washer behind the packing nut. Remove the packing nut as well as pull the stem out of the tap body. The deal should be removed from the stem to get the packaging nut and washing machine off. Take the faucet to a plumbing supply store as well as match the washing machine. Re-assemble the washing machine and packaging nut in the same order they were eliminated from the stem. If you purchased a fixing set you need to change all the other washing machines right now to help protect against even more leaks from various other components wearing out.
Dripping Out Of The Tap End – -Make sure to turn the water off prior to removing the faucet stem! Consistent dripping from the tap after it is shut down is caused by poor washers at the end of the shutoff stem.
Repair The Leaky Tap End: A leakage appearing on the tap when it is shut off is repaired by changing the washers at the shutoff end of the stem which is deep inside the faucet body. Get rid of the tap stem by loosening the packing nut on the front of the faucet, immediately behind the faucet manage. After the packing nut is off you will certainly be able to draw the shutoff stem out of the faucet. There are three washers on frost-free pipe bibs. The washing machines that are farthest from the faucet handle are the washers that stop water from dripping when the tap is shut down. All the washers must be changed when the tap is uncoupled. Utilize a screw motorist to eliminate the screw holding the washing machine as well as valve parts onto completion of the valve stem. Roll the washing machines off the stem and afterward set up the new washing machines in the very same order as well as direction. Put the valve stem back into the faucet and also tighten up the packaging nut. If the faucet still leakages after replacing all the washers after that it may be time to replace the leaky tap.
Dripping From The Stem Behind The Wall: This leak is typically one of the most damaging to a house since it allows water to run inside the house when the dripping tap is turned on. If when the tap is turned on it leakages inside your home which means that there is a hole in the wall of the tap tube.
Repair The Leaky Tap Stem: The only means to repair this leakage is to change the entire tap. Remove the faucet by putting a wrench on the tap and also unscrewing it from its connection behind the wall. Take the faucet to a plumbing supply shop as well as match the television size with a brand-new one. Install a brand-new tap by putting 3 wraps of Teflon tape around the threads on the shutoff, screwing it into the strings of the fitting inside the wall, and tightening it. Make certain that the tap inclines slightly beyond your house so it will drain when it is shut off. If you can’t fix it yourself you can hire plumbing services to do it for you.
After fixing the leaking tap examine it by turning it on and off. Bear in mind that a frost complimentary tube bib ought to drain pipes for a few secs after it is turned off. When the water quits running you know you have fixed your dripping tap!